

Tutorial - Terrestrial Planets - Part 1

| Published: | 06.11.2025 |
Goal
Download
Step 1 - Image-Map
Step 2 - Image-Map + Bump-Map
Step 3 - Spherical Heightfield
Step 4 - radial errors
Download
Step 1 - Image-Map
Step 2 - Image-Map + Bump-Map
Step 3 - Spherical Heightfield
Step 4 - radial errors
Goal
The goal is to bring rectangular maps into a round shape, and on top of that, to let Povray create realistic shadows. To do this, we need two maps of a celestial body, in our case the moon.
First, a color map of the surface that is as pure as possible. This should not contain shadows, only the color values of the surface. As if every area was illuminated by the sun exactly from above or vertically.
Secondly, we need an elevation map, called DEM (Digital Elevation Map). In it case, black stands for the lowest point, white for the highest, and gray values form the values in between.
Both maps are twice as wide as they are tall and appear distorted in width towards the poles in the rectangular version. This is quite normal, as the rectangular maps are placed around a sphere and the polar regions are compressed together.
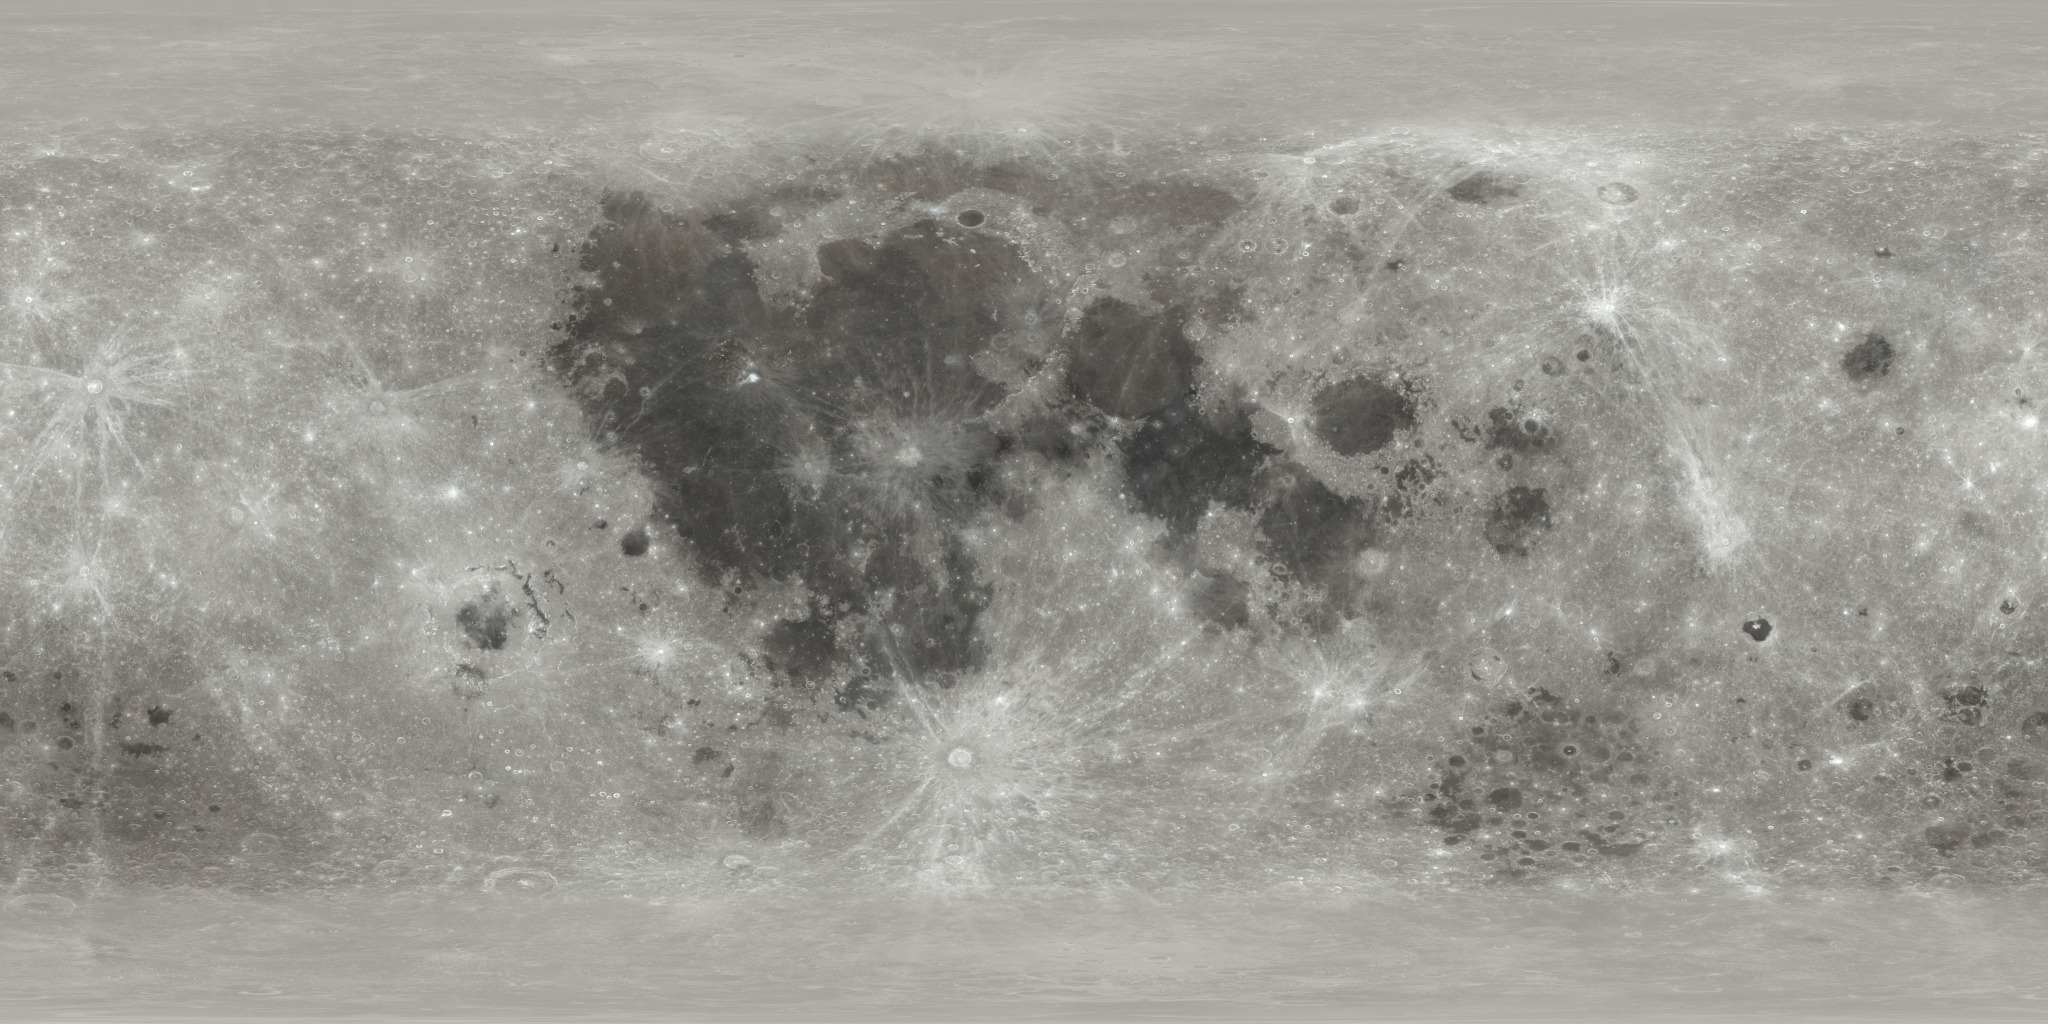
Moon Surface

Moon DEM
Download
So that the scripts shown here can be tried out and understood right away, all files are included in the zip file below. In order to keep the file size small, high-resolution images were dispensed with and maps with a maximum size of 4000x2000 pixels were used.
⬇ tutorial_povray_planets.zip => 9 Files - 17 MBThe individual steps can be carried out with command lines, which are stored at the top of the respective script. Example:
povray +Ima_tutorial_planet_step1.pov +Otest/step1.png +w1600 +h1200 -GR +A
Step 1 - Image-Map
The basis of all examples is a sphere that is generated at <0,0,0> and whose texture is changed with each step.
#version 3.7;
global_settings { assumed_gamma 1.0 charset utf8 }

#local oPlanet = sphere {
	<0,0,0> 1
	texture {
		pigment {
			image_map {
				jpeg "map_moon_4k_surface.jpg"
				map_type 1		//1 = spherical
			}
		}
		finish { ambient rgb (<2,1,1> * 0.01) }
	}
}

object {
	oPlanet
	rotate y*-90
}
light_source {
	<0,0,100000>
	color <1,1,1>
	rotate y*130
}
camera	{ perspective right x*image_width/image_height sky <0,1,0>
	location	<0,0,-20>
	look_at		<0,0,0>
	angle		10

}
	texture {
		pigment {
			image_map {
				jpeg "map_moon_4k_surface.jpg"
				map_type 1		//1 = spherical
			}
		}
		finish { ambient rgb (<2,1,1> * 0.01) }
	}
object {
	oPlanet
	rotate y*-90
}
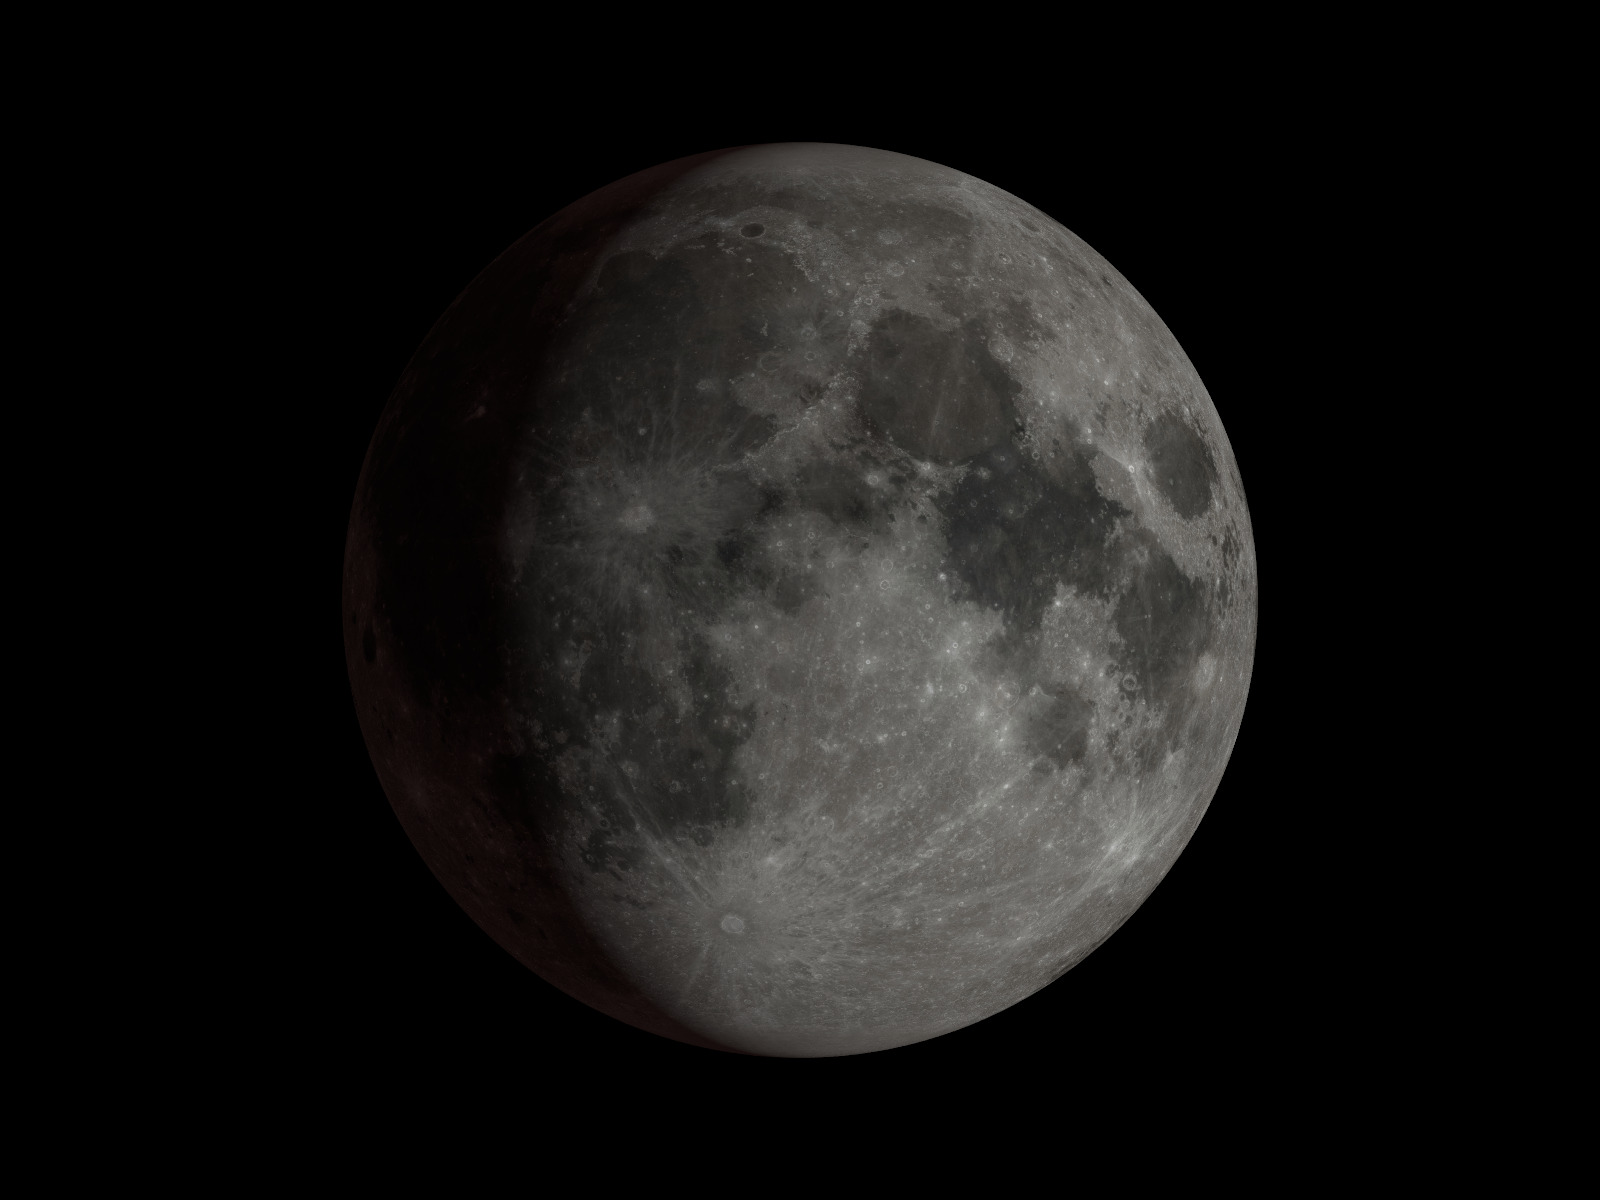
rotate y*90 stands for waxing crescent moon, y*180 for full moon, we choose something between.
light_source {
	<0,0,100000>
	color <1,1,1>
	rotate y*130
}
camera	{ perspective right x*image_width/image_height sky <0,1,0>
	location	<0,0,-20>
	look_at		<0,0,0>
	angle		10
}
Step 2 - Image-Map + Bump-Map
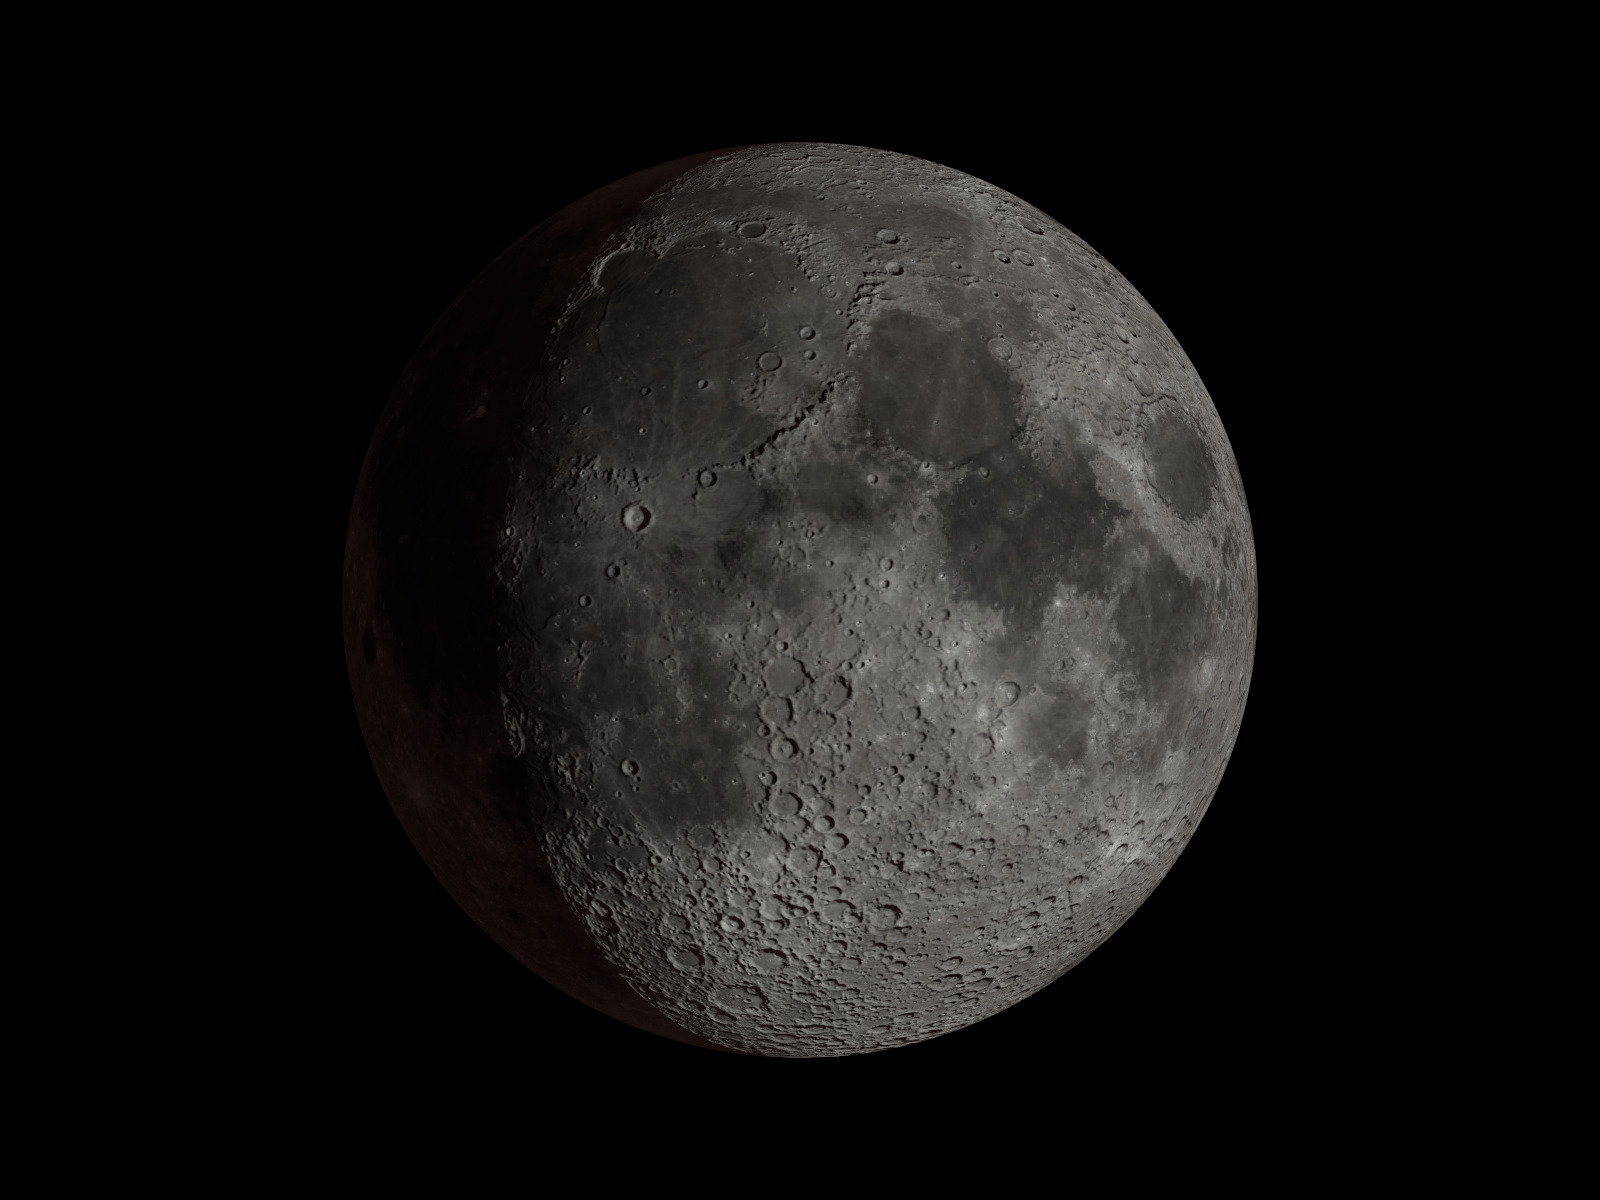
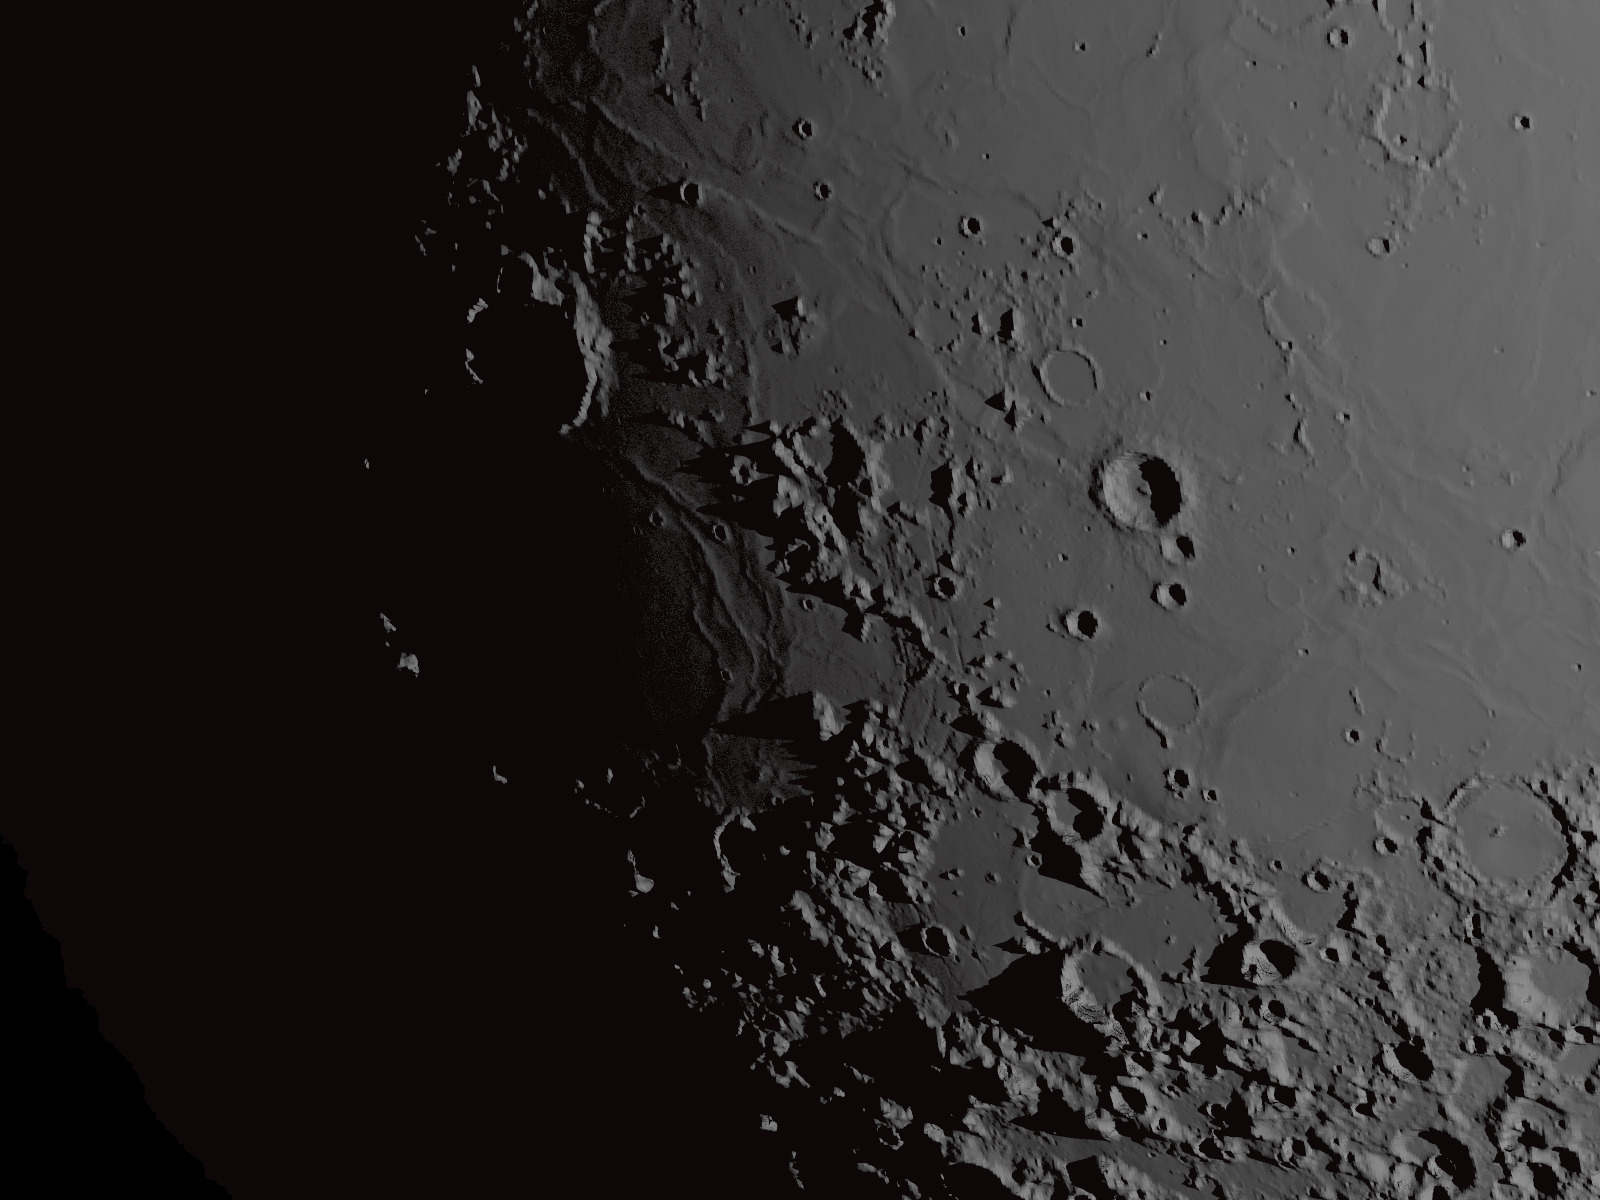
Only with the image map do we get an absolutely round sphere, without any shadows. Except of course that the side facing away from the light is in shadow, but none of the craters and mountains create dark areas.
To create the first shadows, we add a normal statement between the pigment and the finish.
		pigment { ... } //unverändert wie Schritt 1
		normal {
			bump_map {
				png  "map_moon_4k_dem.png"
				map_type 1
				interpolate 2
				bump_size 100 once	//Height of the DEM
			}
		}
		finish { ... } //unverändert wie Schritt 1
camera	{ perspective right x*image_width/image_height sky <0,1,0>
	location	<0,0,-20>
	look_at		<-.5,-.4,-.5>
	angle 2
}
The round sphere is still absolutely round.
Step 3 - Spherical Heightfield
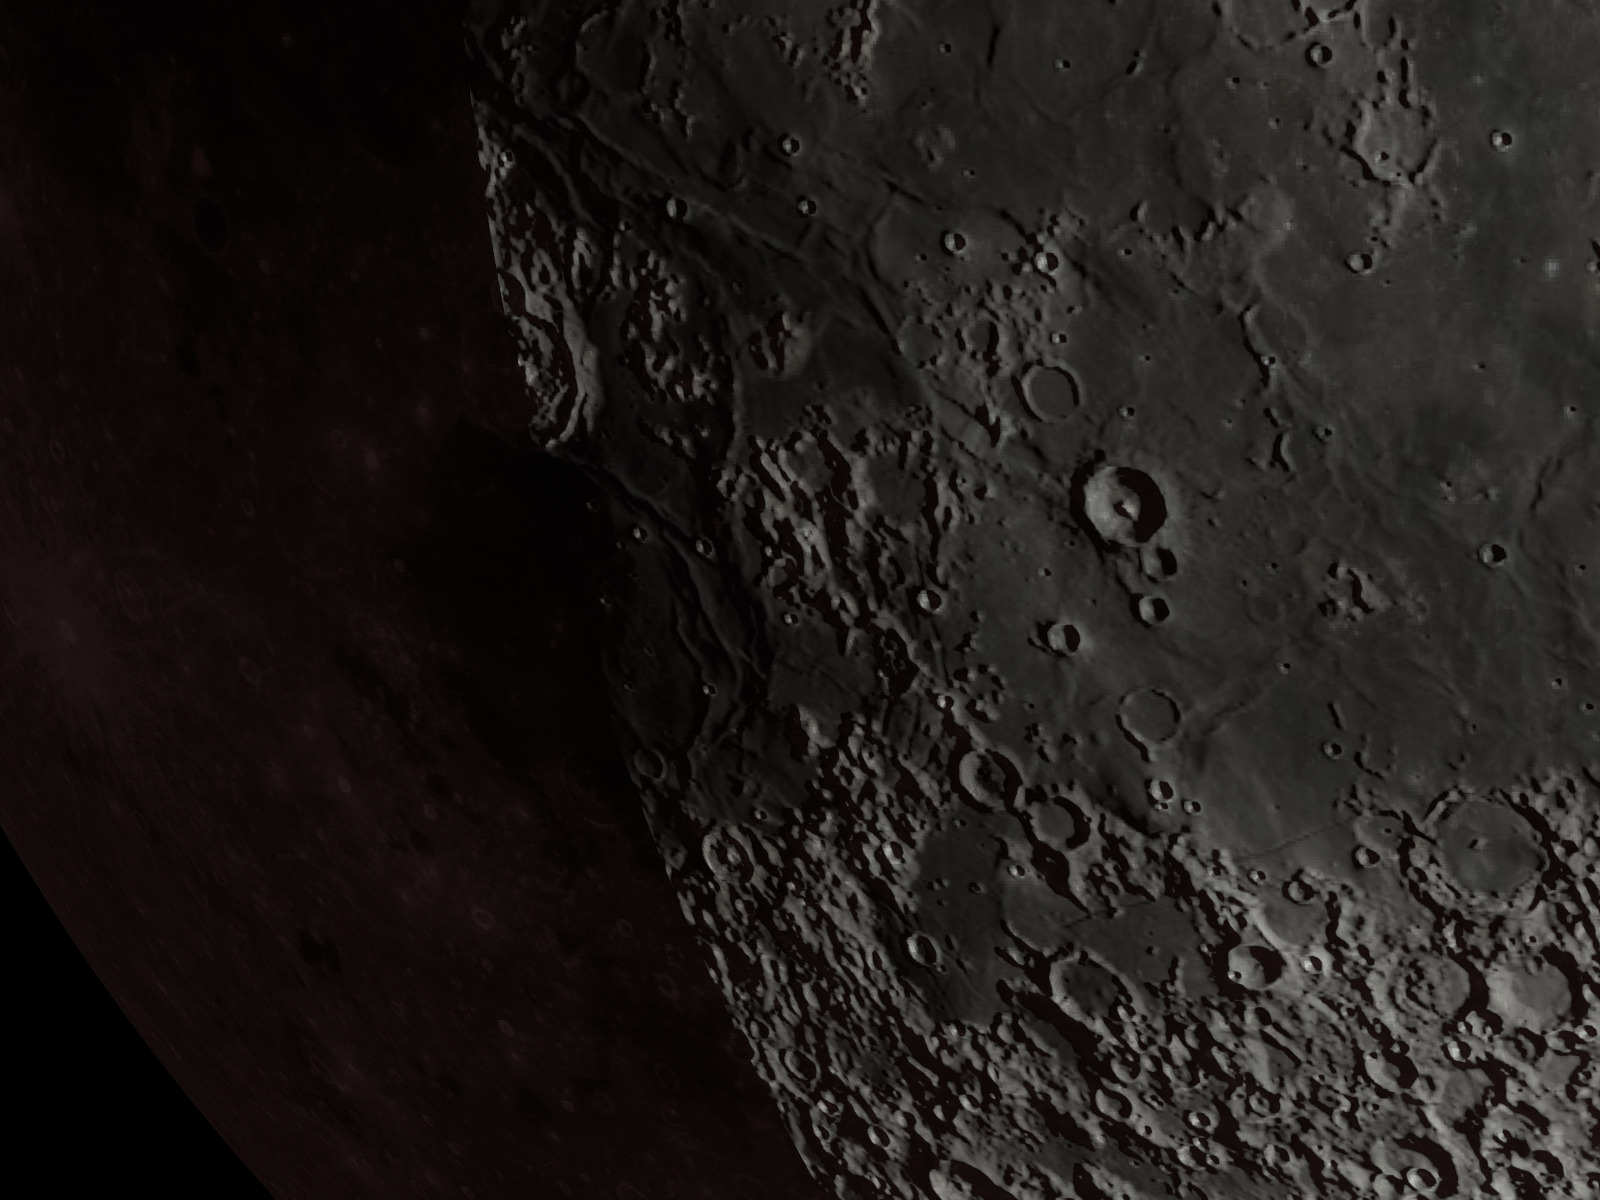
Realistic shadows cannot be created with bump-maps, for that we need spherical heightfields.
We change the entire script. We only take care of the shadows, leave out the surface map for the time being and use a simple color texture in its place.
//start as before

#local nRadius		= 1;
#local nFactor		= 0.35;
#local nHeightDiff	= 50;  // the more the higher the contrast between valleys and hills

#local PlanetSphere_F		= function {internal(61)}
#local PlanetHeightfield_F	= function {
	pigment {
		image_map {
			png "map_moon_4k_dem.png"
			map_type 1
			interpolate 2
		}
	}
}
#local oPlanet = isosurface {
	function {
		PlanetSphere_F(x,y,z, nRadius)
		- PlanetHeightfield_F(x,y,z).gray*nHeightDiff/1000*nRadius
		+ nFactor*nRadius
	}
	contained_by { sphere{0, nRadius} }
	max_gradient 1.3
	accuracy 0.0001
	texture {
		pigment {
			color rgb (<1,1,1>*.5) //Instead the surface-map
		}
	}
	finish { ambient rgb (<2,1,1> * 0.004) }
	scale 1/(1-nFactor)
}

//output, camera, and light as before
Step 4 - radial errors
However, our result so far has an annoying flaw.
Let's zoom in, again to the Mare Humorum in the lower area, change the settings of the camera in the file step-3.
camera	{ perspective right x*image_width/image_height sky <0,1,0>
	location	<0,0,-20>
	look_at		<-.51,-.41,-.5>
	angle 		2
}
SIZE - DOES - MATTER
The radius of our planet must be significantly increased. Not from 1 to 10 or 100, let's go straight to 1000.
Disadvantage: The render time increases also significantly. You shouldn't overdo it too much with the size of the object.
Of course, the camera must then also be moved by a similar factor.
camera	{ perspective right x*image_width/image_height sky <0,1,0>
	location	<0,0,-20000>
 	look_at		<-510,-410,-500>
	angle 2
}
		pigment {
			//color rgb (<1,1,1>*.5) //test-color
			image_map {
				jpeg "map_moon_4k_surface.jpg"
				map_type 1
			}
		}
